
By Disney Magic Diva
Walt once said “It’s kind of fun to do the impossible.” If you’ve ever tried to get a FastPass+ for Anna and Elsa, you might have an all new appreciation for that sentiment. And even though it’s difficult to score those hot choices, it is not impossible to land the FastPass+ selections you and your family have your heart set on to make your stay at Walt Disney World Resort as magical as you’ve imagined. Here are my top 10 tips to getting the FastPass+ your heart desires:
- Set up your account. First, you need to be aware that to make FastPass+ selections, you must have a My Disney Experience account. Each person will need an account, even children. It’s easy and secure. Just visit the Walt Disney World website, select “Create an Account,” and follow the prompts. There is also a My Disney Experience app which is highly recommended. Download it to your smartphone to help plan and manage your trip. It will be useful not only for FastPass+, but also dining, park hours, attraction wait times, special events – almost anything you’ll need for your vacation!
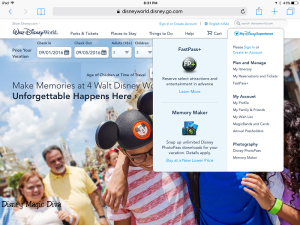
When you click on “My Disney Experience”, this drop down menu appears.
As a corollary to this step, you will want to link your party’s accounts to each other. To do this, go to the Disney World website and hover your cursor over the “My Disney Experience” logo in the top right hand corner. A drop down menu will appear. Click on “My Family and Friends” and follow the prompts.
- Buy your park tickets early. Since you must have a park ticket in order to make FastPass+ selections, you’ll want to purchase your tickets early so you’ll have time to plan your FastPass+ choices, and then be ready to book them on the first day you are eligible to do so. If you purchase a resort package, your tickets will be magically linked to your reservation. If you are staying off site, you’ll need to link your park ticket to your My Disney Experience account. Login to your account, click on “My Reservations and Tickets,” and a new page will open. Scroll down until you see the “Link Tickets” button, click and follow the directions to enter your ticket information.
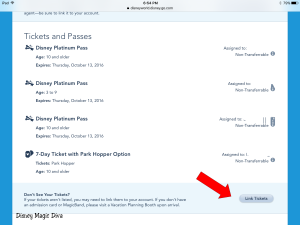
Link your park tickets to your My Disney Experience account.
- Stay at a Walt Disney World Resort. If you have a resort reservation, you can make FastPass+ selections 60 days in advance of your check-in date. If you don’t have a resort reservation, you may make FastPass+ selections 30 days in advance. (Just another advantage of staying at a Walt Disney World Resort! For other benefits, read “Why Should I Stay at A Walt Disney World Resort?” )
- Determine your FastPass+ day. Whether it’s 60 or 30 days in advance, be sure to accurately calculate when you are able to make FastPass+ selections, and put it on your calendar! You can start with your check-in day, and count backward on the calendar, or you can use your favorite app or Google search. Just be sure to double check. I also like to mark my calendar for a couple weeks before my FastPass+ day with a reminder that the all-important date is coming up. This way I’m sure to have time to check with family members as to what their preferences are with regard to attractions and our itinerary, (see step 5) and I’m not stressed the day before trying to plan out our trip.
- Plan, plan, plan. While you’re waiting for your FastPass+ day to arrive, decide which attractions you’d like to schedule. This is much easier said than done. So many considerations come into play when making these choices. Our family likes to consider crowd levels, and often rely on the Crowd Calendar at touringplans.com. We also look at park hours to decide which park to visit on each day of our stay. Any dining reservations need to be taken into account too. You wouldn’t want to miss a FastPass+ time because you’re enjoying a meal, nor would you want to add stress to your vacation by having to dash from park to park to make your FastPass+ times and dining reservations. By balancing these factors, we make an itinerary and from there decide which attractions to choose for FastPass+.
- Schedule hard-to-get attractions late in your trip. Another advantage of staying at a Walt Disney World Resort is your ability to schedule FastPass+ for the length of your stay on the first day you are eligible to make FastPass+ selections. For example, let’s say you have a resort reservation for July 1-7th. Your FastPass+ day is May 2nd, 60 days before July 1st. So on May 2nd, you can schedule FastPass+ choices for July 1st , AND FOR EVERY OTHER DAY OF YOUR TRIP! Essentially you are scheduling FastPass+ for days up to 67 days in advance! That gives you a 7 day “head start” on those hard-to-get attractions! Want your best shot at getting a FastPass+ for Frozen Ever After? Try arranging your itinerary to schedule it for the 6th or 7th day of your reservation.

NOTE: This step only applies if you are staying on property. If you do not have a resort reservation, you can only make your FastPass+ selections for 30 days in advance. You won’t be able to get the “head start” referred to above. In the example above, on June 1st you could schedule FastPass+ for July 1st, on June 2nd you could make selections for July 2nd, on June 3rd for July 3rd, and so on. It may be a little harder for you to secure FastPass+ for extremely popular attractions.
- Refine each day’s plan. After we’ve selected which park to visit on which day, and which attractions to choose for a FastPass+, we start making a very general guideline of what times we’d like to schedule our FastPass+. This is very subjective, and each family will need to determine what works for them. We are a “hopper” family. We like to get to a park for rope-drop and hit up as many attractions as possible before the crowds arrive. We schedule our FastPass+ times for mid- to late afternoon, sometimes at the park we began the day, sometimes at a different park. It all depends on crowd levels, park hours, dining reservations and just plain personal preference. But once we’ve identified our FastPass+ attractions for the day, we decide on a targeted time for each. For example, we might choose Space Mountain at 1:00, 7 Dwarfs’ Mine Train at 2:00 and Big Thunder Mountain at 3:00. Remember, it’s just a target at this point.
- Set your alarm clock. FastPass+ reservations become available at 6:00 am Eastern Time. This is crucial information to remember! If you want to make your FastPass+ selections at the first possible moment, you’ll want to set your alarm clock, especially if you live on the West Coast!
- Enlist help. We usually have 2-3 adults (or capable teenagers) sitting around the kitchen table, each with our laptop or ipad and the master schedule we’ve developed. We prioritize the days in terms of importance, and schedule the most important days first. We each take a day, and schedule for the entire group. Sometimes we shout out questions about alternatives when things don’t work out as planned, and make spur of the moment decisions. It kind of resembles a command center at times, but it works! I should note, this is easiest if everyone is getting the same FastPass+, but that’s not required. Just be sure the people actually scheduling FastPass+ are linked to everyone for whom they are scheduling. (See step 1)
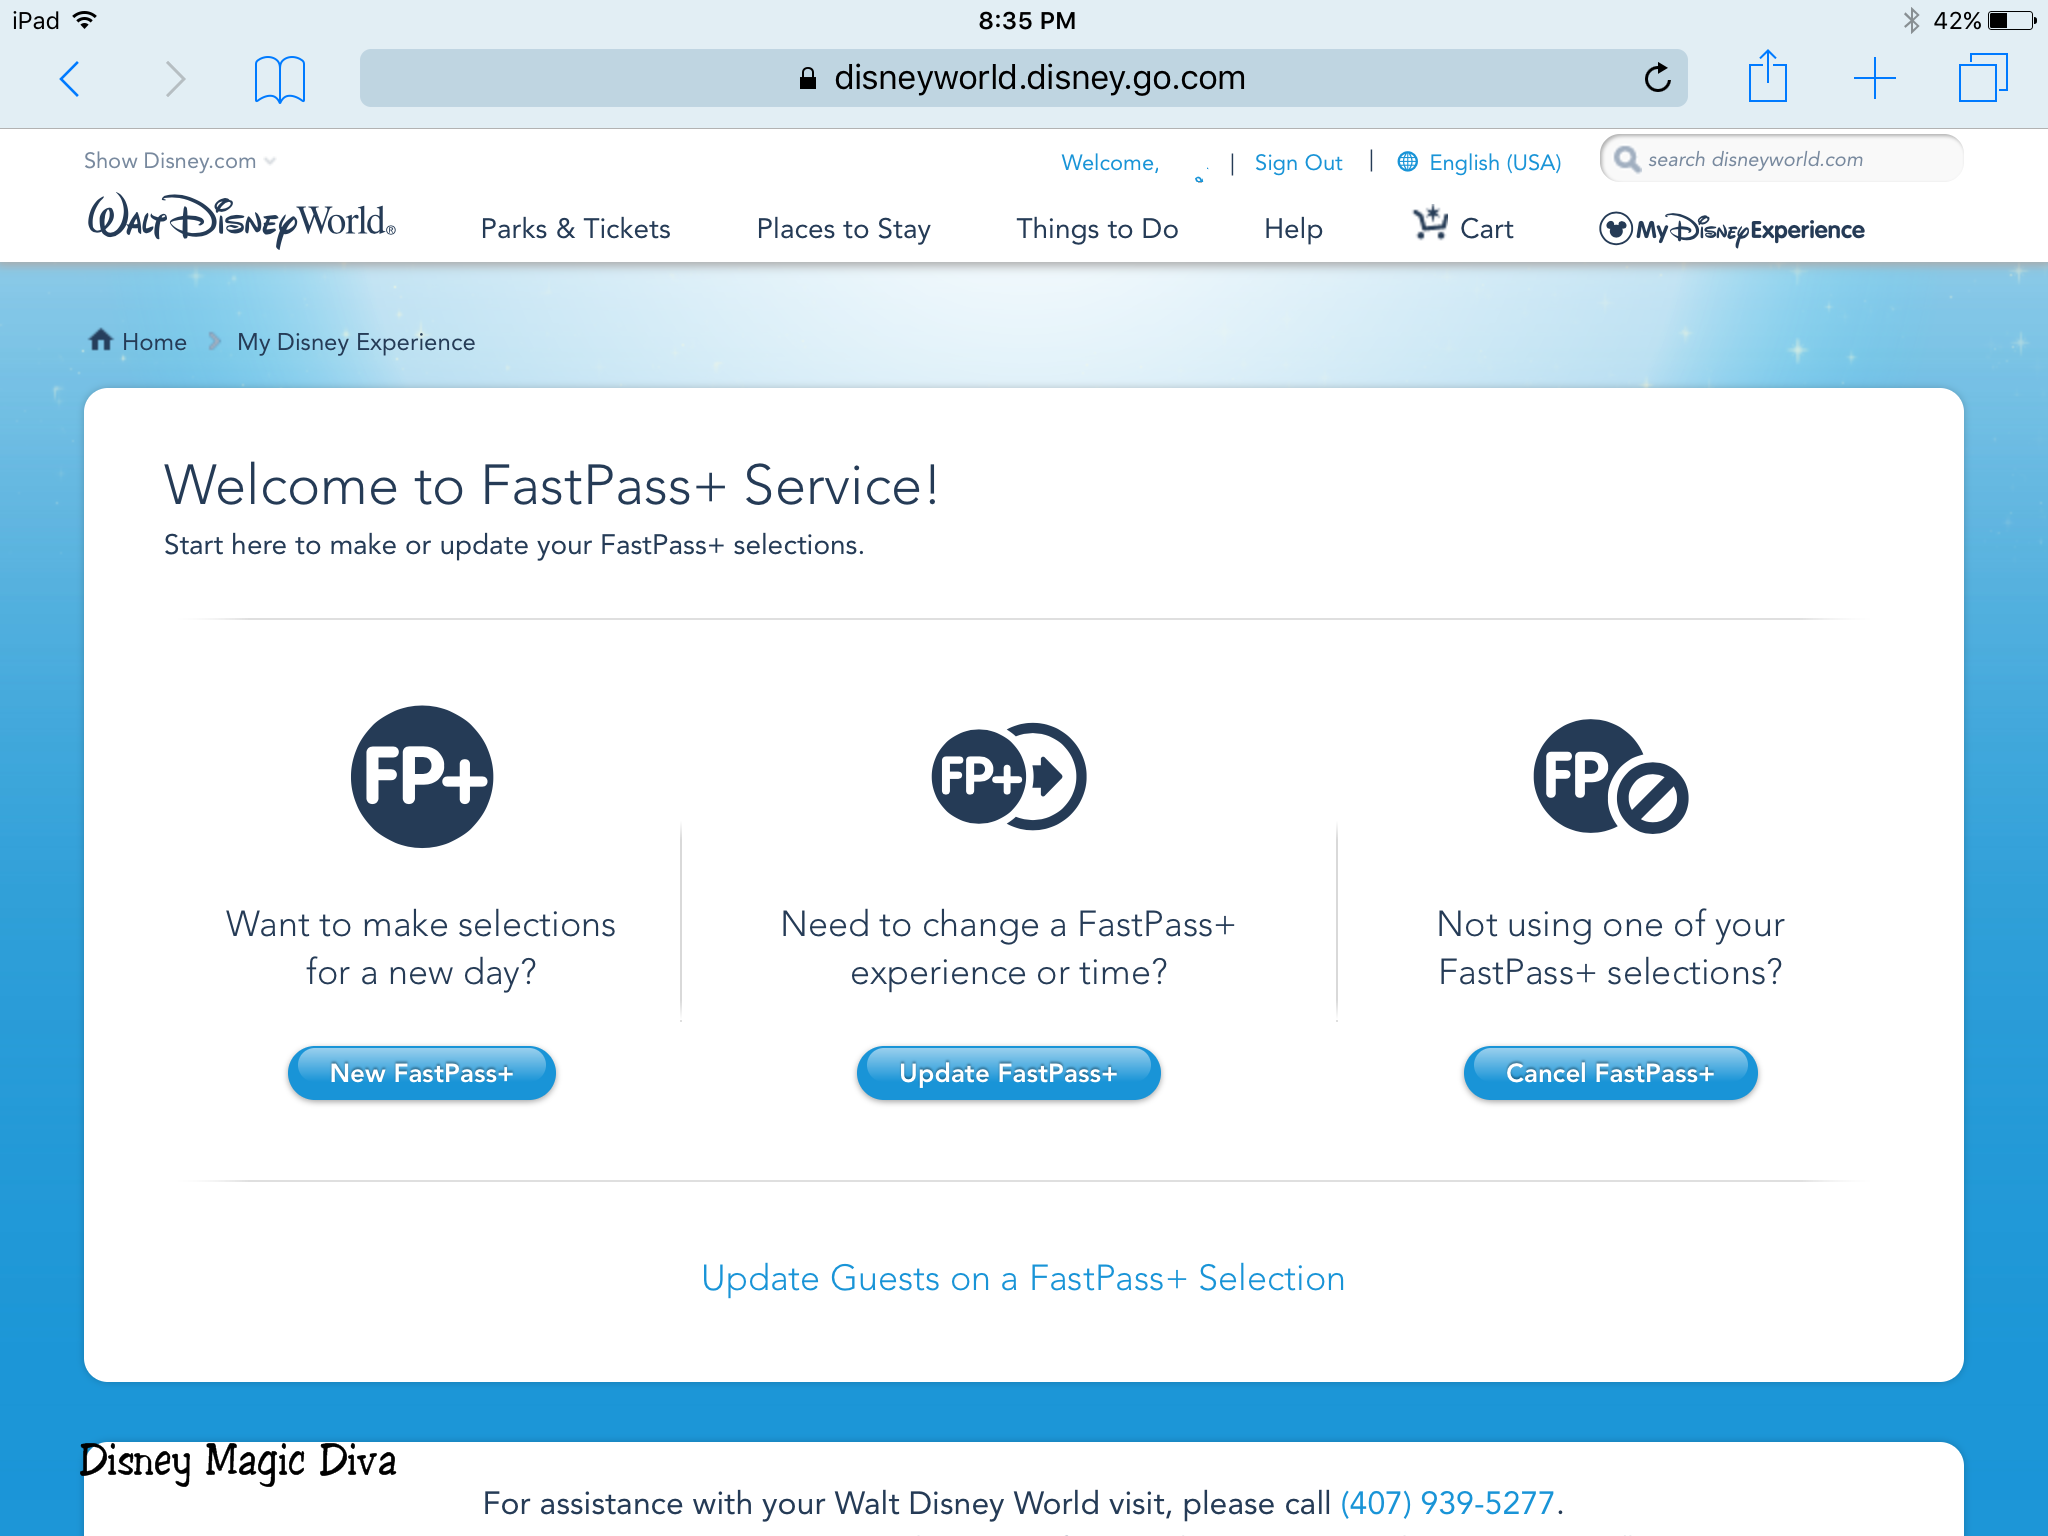
- Schedule FastPass+! When booking, our family prefers to use the website rather than the mobile app. Login to
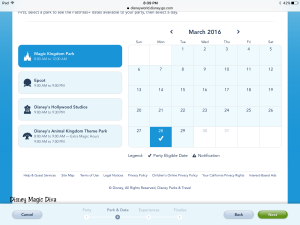
The calendar will highlight dates you are eligible to make a FastPass+ selection. Click on the date and park you want to schedule.
My Disney Experience and click on FastPass+. Then click “New FastPass+” and you’ll be asked to select the party. This is why it’s important your entire party is linked in Friends and Family. If you are not linked, you won’t be able to select them as part of the FastPass+ party. Next you’ll choose which park you’re making selections for, and which day you want to schedule (see photo on left).
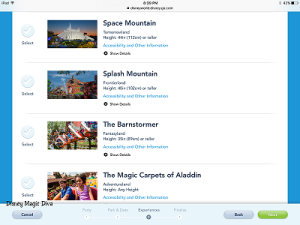
A list of possible attractions will pop up. (This is just a screenshot – there are many more options when you are actually making selections).
From there a window will open which lists all the FastPass+ possibilities. Choose the 3 you want, and Disney will give you 4 sets of choices for times of FastPass+ for your chosen attractions. None of these will be ideal, but don’t worry. Choose the one closest to your target times, and click “done.”

Note the “Option” buttons across the top. Choose the one that works best for you.


It’s easy to change the time of a FastPass+.
After the FastPass+ choices for the day are confirmed, you can modify the time for each attraction. By doing this, you will hopefully be able to get closer to your target times. If the time you’re looking for doesn’t appear, check to see if another FastPass+ is scheduled for a time that would conflict. Don’t be afraid to move a particular FastPass+ to a “placeholder” time to allow you to modify times for other FastPass+ attractions. Once the conflicting time is eliminated, you may find that a better time becomes available in the drop down menu. Select your preferred time, and then you can then move the “placeholder” back to a more acceptable time.
We’ve used this approach the last several times we’ve traveled, and we’ve been able to get every FastPass+ time and attraction we really wanted. Click here to read Pixie Dusted Diva’s article “How to Make FastPass+ Experiences!” Ready to plan your own trip? Contact Patricia at All for Dreams Travel! With some advanced planning, your trip can be magical too!
***Disclaimer – We at Tips from the Disney Divas and Devos hope you enjoy reading our articles, and encourage you to share any you feel may be of interest to someone else. We do ask, however, if you choose to share the photographs attached to our articles, you give credit to the photographer. Thank you for your cooperation and sharing our love of Disney!


Thank you Disney Magic Diva for all the fast pass tips…we will definitely be making use of them!