
By Sleepy Diva
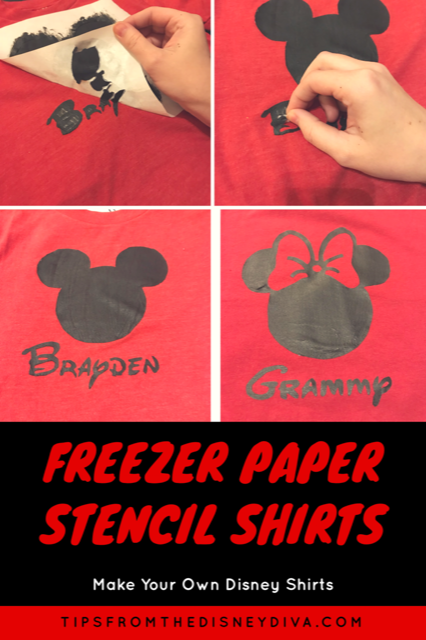

Matching Mickey and Minnie Shirts for Magic Kingdom
I love all aspects of planning for a trip, but I hate packing. I like making packing lists, but the actual packing part, not so much. This goes for any trip, not just Disney. I always over-pack because I want plenty of options; you never know how you are going to feel about a particular outfit when you get to where you are going…or is that just me? When I started planning our first family trip I knew I wanted us to have matching shirts for one of the days. Etsy had so many cute shirts, but I found an easy way to do it on my own using freezer paper stencils ( and it would save me money, what’s better than that?). Then, once I decided to do that I thought to myself, why not make shirts for each day? Not only did this make packing so much easier, I didn’t have to worry about what I wanted to wear each day.
Now, I probably went a little overboard and I made shirts themed to the specific parks. For Magic Kingdom I did Mickey heads for the boys and Minnie heads for the girls and put our names on them, for Hollywood Studios it was Sorcerer Mickey, Animal Kingdom was Lion King, and we also did a day at Universal Studios so we each had a Harry Potter themed shirt.
Each trip I usually make at least one new shirt. I love making them, and it gets me even more excited for my upcoming trips. Whether you want to make one shirt or a whole set of themed ones, I’ve got you covered!
What you will need:
- Shirt
- Freezer Paper*
- Print out of the image
- Exacto Knife
- Cutting Mat
- Iron
- Permanent Fabric Paint (Matte)
- Foam Paintbrushes
- Hairdryer
- Sharpie
- Cardboard or piece of paper
*Note: I bought my roll of freezer paper 3 years ago. I have made at least 20 shirts and still have paper left on the roll. It will last you forever!
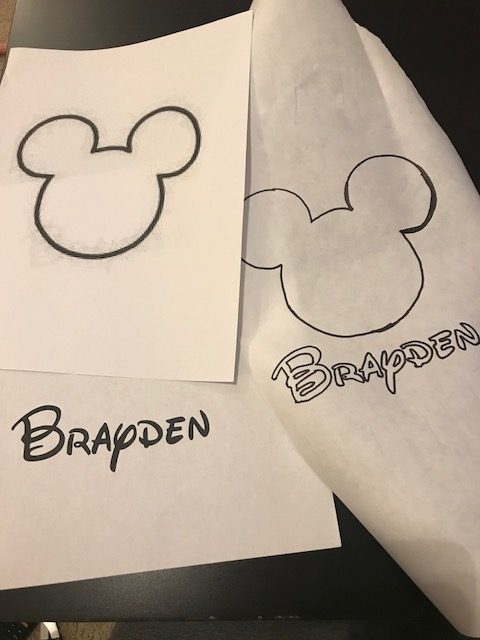
Print outs of my image and text and then traced onto freezer paper shiny side down)
Before you start, you need to figure out what image you want to use for your shirt. You can just do a google image search for whatever you want. I find it most easy to do silhouettes because they don’t have as much detail. You can do detailed pictures if you want, it just takes a lot more work with the exacto knife. Print out your image in the size you want it for your shirt.
Note: if you can draw and would rather take that route, you can draw the image straight onto the freezer paper.
Tear off a piece of freezer paper big enough and place it over the image with the shiny side down. Trace your image onto the freezer paper using the sharpie.
Tip: if you are having difficulty seeing the lines of the image, turn on the flashlight of your phone and place it under a clear glass baking pan. Place the image and freezer paper on top and it should be easier to see the lines for tracing.
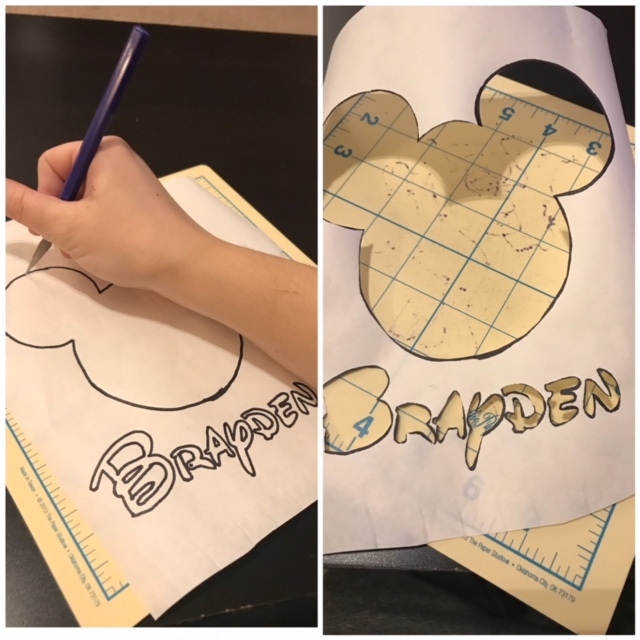
Cut out your image to make your stencil
Once your have your image traced, it is time to make the stencil with the freezer paper. If you have a lot of blank freezer paper, cut it down to a workable size. It is much easier to cut with the exacto knife when you don’t have to work with a giant piece of paper.
Place your freezer paper on the cutting mat. Using the exacto knife, carefully cut out your image and any text you may have added.
Remember, anything you cut out is going to end up painted. If your picture has more detail, you will save pieces that you have cut so that part of the shirt isn’t painted. Like for the bow for Minnie and text pictured below:
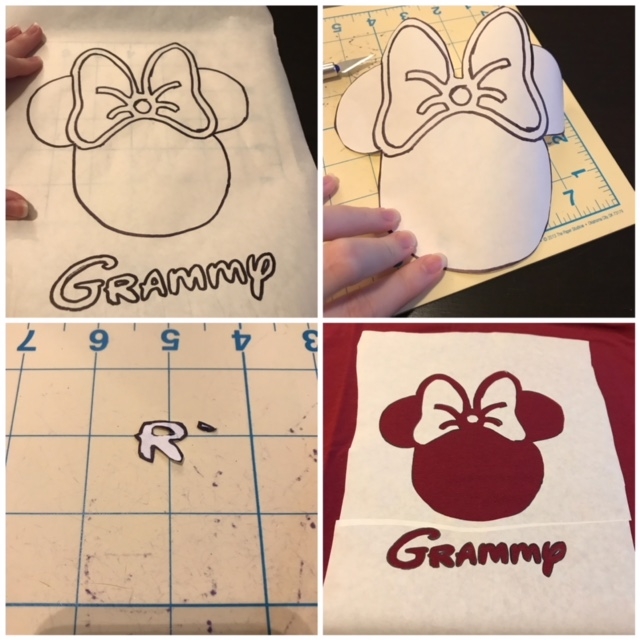
I don’t want Minnie’s bow to be black so I cut out the center of the bow and save the pieces because this is the part that I want to be red; they will be ironed down onto the shirt separately. The same goes for letters, for example the center of an R, you would cut the center out and save it for when you iron everything down.

Iron on your stencil and start painting
Once you have everything cut, it is time to iron your image to the shirt. Place everything where you want it, shiny side down. Take a warm iron and run it over the freezer paper so that the paper sticks to the shirt. Don’t forget to also iron down the pieces that you have cut out that you don’t want painted (the center of letters, the bow, etc.).
Before you start painting, make sure you place cardboard or a piece of paper inside the shirt incase the paint runs through; you don’t want it to stain the back of the shirt. After everything is set in place, it is time to paint! You can use other types of paint (like shiny or metallic), but I have found that matte paint works best. It just seems to look better, and it usually seems to provide a more precise line when you peel off your stencil. I usually apply 2-3 coats of paint. In between coats, run the hairdryer over the shirt until the paint is dry.
Once you have finished applying paint, it needs to dry thoroughly. You can let it dry overnight but I am usually too impatient for that. I run the hairdryer over the image for a few minutes until the paint feels dry. If you are having trouble peeling off the stencil and it doesn’t seem to have a clear cut line, you need to let your paint dry longer; either let it sit or run the hairdryer over it for a little longer.

Peel off your stencil
After you are sure it is dry, carefully peel off your stencil, including any of the other pieces you have ironed down for detail.
If there are any other details that need to be added, do that now.I wanted white dots on Minnie’s bow so I used a small paint brush to hand paint those dots on.
Once you are through and everything is dry, place a thin cloth or towel over the image and run the iron over it to set the paint.
I have worn and washed my shirts so many times and the paint has never faded.
Here is a look at some of the shirts I have made over the past few years:

Are you ready to start planning your next trip? Visit Patricia at All For Dreams Travel, she can answer any questions you have and get you a quote. Best of all, her services are free!


